Lesson 7 - Rigging
What is Rigging?
Rigging is the process of creating a control structure for our Character that makes it easy to drive and animate its movements later on.
This control structure is called the Rig and its elements are organized in a Parent/Child - Hierarchy. The way the different elements of the hierarchy are able to move can be limited in different ways by using Constraints
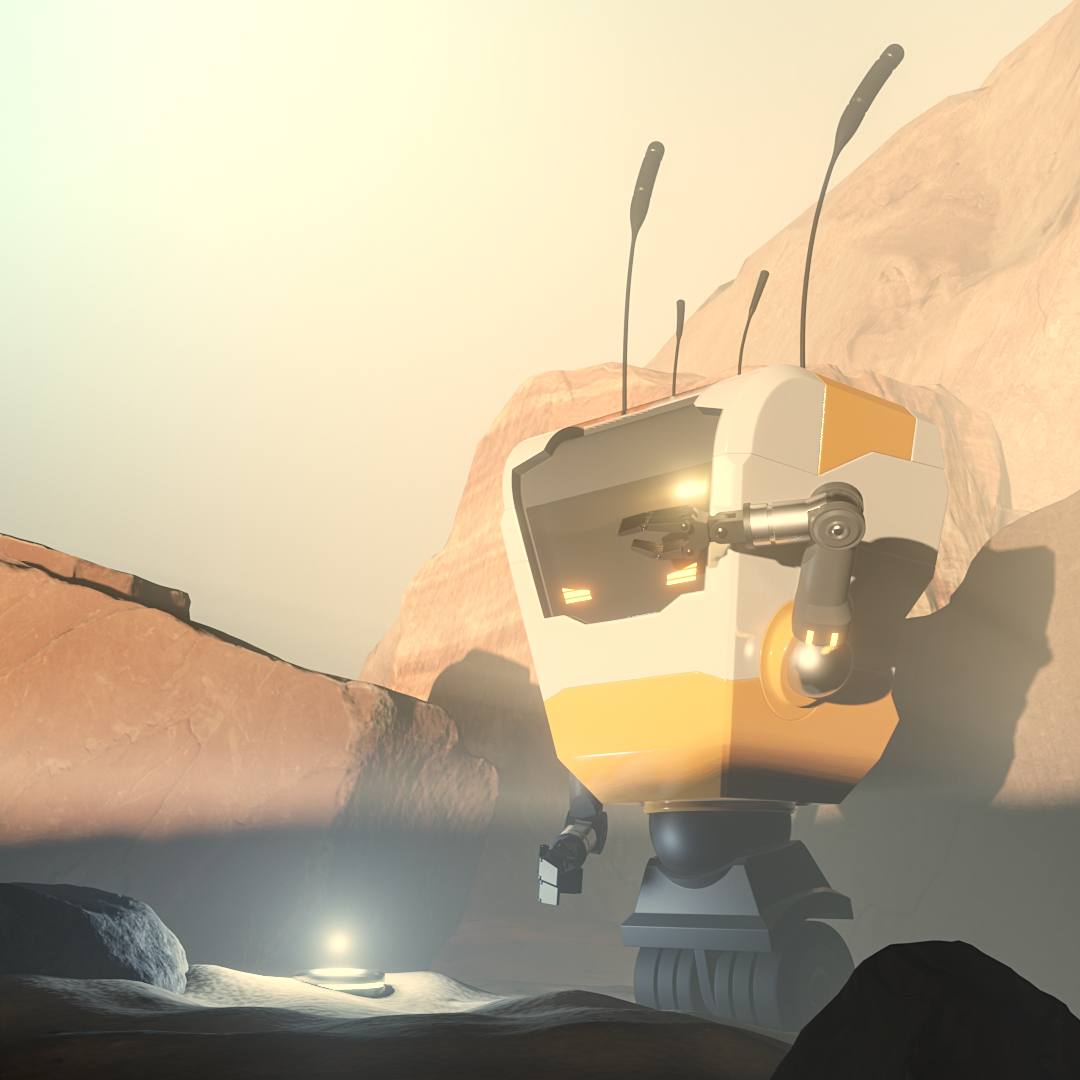
example of a rig / character skeleton (Armature), here you see the Armature that drives the robot VIC shown in the render at the top.
Parenting
Through Parenting we can assign an object as a child to another object making that object its parent. In this parent/child relationship the child object now follows its parents transformations. When the Parent gets moved, scaled or rotated the child will also get transformed accordingly. All the while the childs transformation values (Location, Rotation, Scale) will not show this transformation. Because they now display the distance to its Parent instead of the 3D World Origin.
| Hotkey | Function |
|---|---|
| Ctrl + P | Parent selected objects to active object |
| Alt + P | Unparent selected objects |
- Blender Manual Link:
Constraints
Constraints limit the transformations an object can perform in a specific way. It’s possible to combine multiple Constraints to create very complex behaviour.
Constraints can be added to Objects and Bones like modifiers by opening the
 Object Constrants Properties Panel. The Constraints
system in blender follows the same rules as the modifier system in terms of
how the User Interface acts and feels.
Object Constrants Properties Panel. The Constraints
system in blender follows the same rules as the modifier system in terms of
how the User Interface acts and feels.

- Blender Manual Link:
- Blender Manual | Constraints
Bones/Armature
To build our Rig we will not use Mesh objects or other geometry we have been using up until now, but a new kind of object called a Bone. With it we will construct our characters Skeleton or Armature.
To start building we need to add an Armature Object to our scene. Add it by pressing Hotkey: Shift + A >> click on Armature.
Hint
The Armature object has 2 Modes we are interested in Edit Mode and Pose Mode we can toggle between those two by pressing Hotkey: Tab.
If you want to return to Object Mode try pressing Hotkey: Ctrl + Tab to open a Pie Menu where you can choose which mode you want to enter.
What is a Bone?
In most 3D Applications bones have a octahedral shape, and feature a head and a tail. A Bone rotates around its head and always points to its tail.
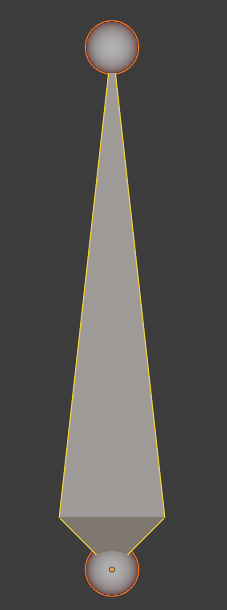
Image showing a single bone with its head at the bottom and its tail at the top.
Armature Edit Mode Hotkeys:
| Hotkey | Function |
|---|---|
| E | Extrude Bone and form a chain |
| Alt + P | Unparent selected objects |
| Ctrl + P | Set active bone as parent to selected bones |
| Alt + F | Flip direction of selected bone (Head & Tail) |
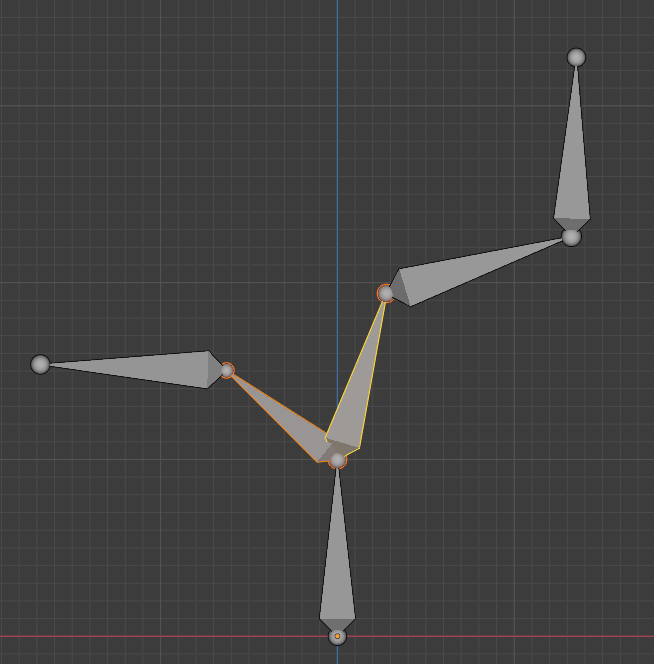
With these tools we can build a hierarchy of bones consisting of bone chains.
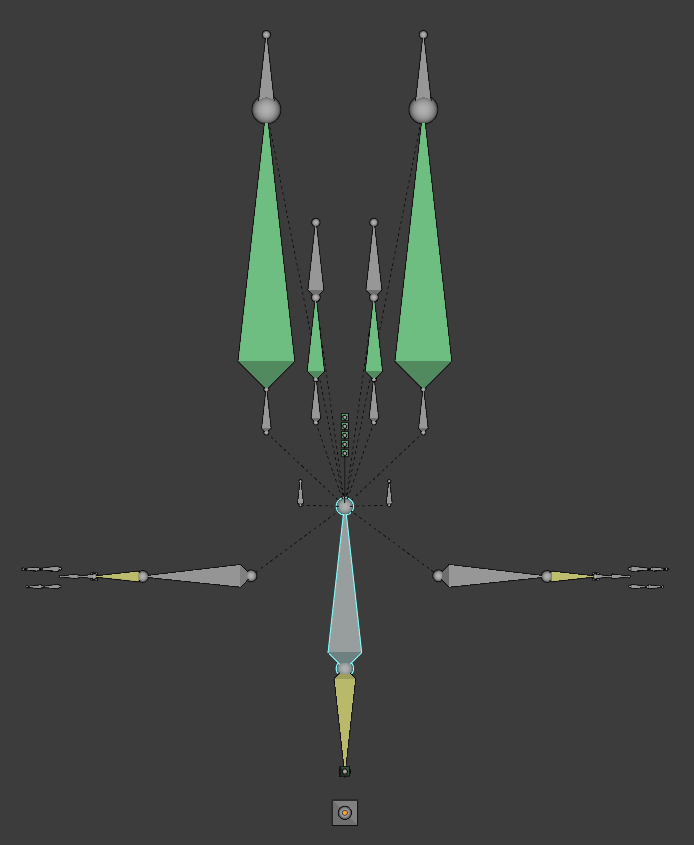
Example of a bone hierarchy consiting of one root bone that acts as the parent of two separate bone chains.
Hint
While building a complex hierarchy we sometimes need to rename a lot of bones. Luckily Blender has a batch rename tool that enables us to do just that. It is accessible via the Hotkey: Ctrl + F2
- Blender Manual Link:
- Blender Manual | Bones
Skinning/Armature Modifier
Once we finished building our Armature we need to bind our character to it. This process is called Skinning, we are binding our 3D Mesh Skin to our Rig/Bones. Every Vertex of our 3D Mesh needs to be told which bone of our Armature it has to follow, it can also follow multiple bones to a specific percentage. By giving each vertex a specific weighting value for each bone we want to affect it we can create smooth deformations of our 3D Mesh.
Blender provides the Armature Modifier for this purpose. We just need to add it to our 3D Mesh Character and put our Armature in the Armature slot.
Hint
A fast way to bind a 3D mesh to an Armature is by selecting the 3D mesh then the Armature and then pressing Hotkey: Ctrl + P >> Select Armature Deform >> With Automatic Weights
This will add an Armature modifier to the mesh and add vertex weightings automatically that help get you started.
- Blender Manual Link:
- Blender Manual | Armature Modifier
Vertex Groups
Binding vertices to bones in done via Vertex Groups you can create them
in the  Object Data Properties Panel. To be able to
bind vertices to specific bones you need to create a Vertex Group with
the same name as the Bone in your Armature for each Bone that should deform
the mesh. (This can also be done automatically for you by using the hint above)
Object Data Properties Panel. To be able to
bind vertices to specific bones you need to create a Vertex Group with
the same name as the Bone in your Armature for each Bone that should deform
the mesh. (This can also be done automatically for you by using the hint above)
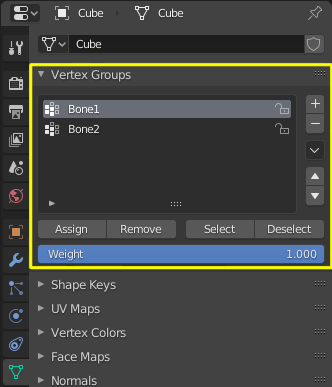
You can add and remove Vertex Groups by pressing the + and - buttons on the top right of the Vertex Groups Rollout. Once you are in Edit Mode the GUI Elements at the bottom will be available. There you can Assign or Remove a specific Weight to the currently selected Vertices.
- Blender Manual Link:
- Blender Manual | Vertex Groups
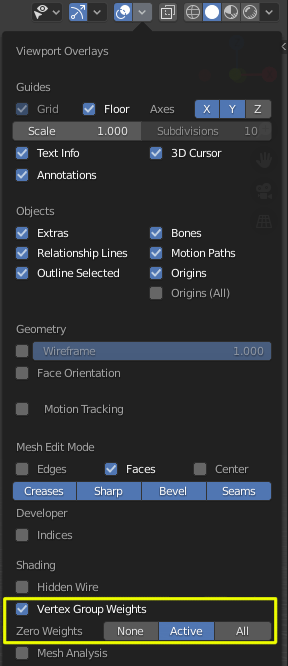
Showing Vertex weights on the Mesh
To be able to see the influence of each bone on our mesh we have to enable some settings in our 3D Viewport. Once we have done that the bones influence on each vertex will be shown with a rainbow color gradient (0.0 = Black, 1.0 = Red).
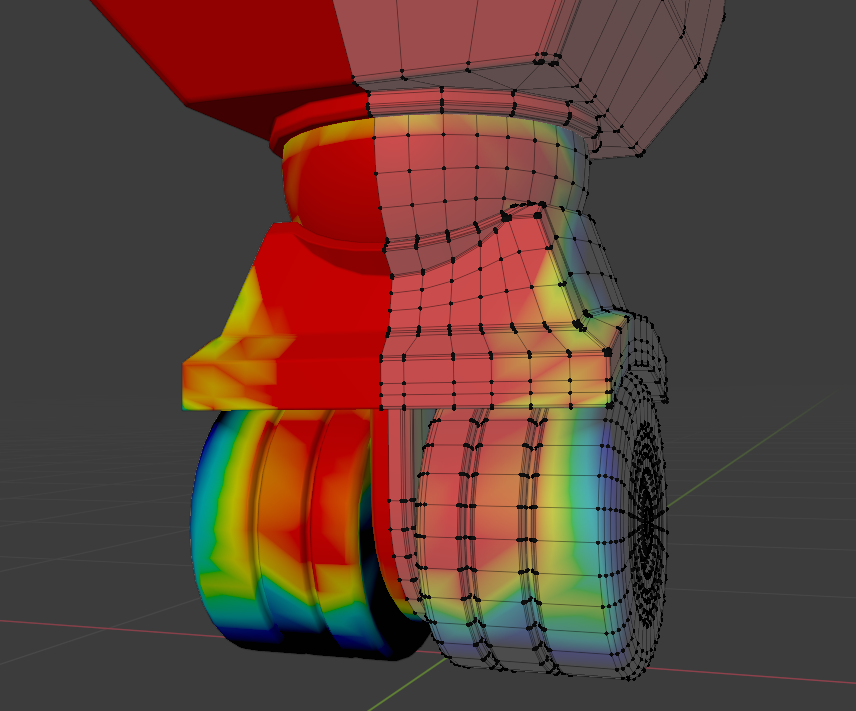
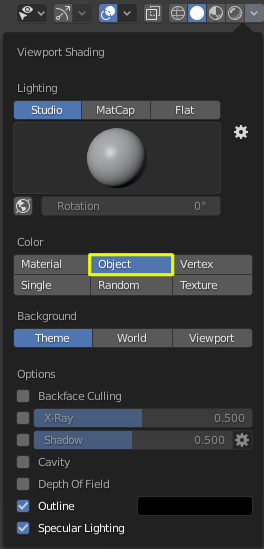
Turn on Vertex Group Weights in the 3D Views Overlay Menu (Top Right) and to make sure the Vertex Weight colors are clearly visible set the Viewport Shading Color to Object
Forward Kinematic / Inverse Kinematic (FK / IK)
When we construct a bone chain all its bones are in Forward Kinematic mode, meaning to change the position of the last bone in the chain we have to rotate all the bones prior until we get the desired position.
This is useful in some and very cumbersome in other cases. That’s why there is another mode of operation that’s implemented with constraints called Inverse Kinematic. This Mode features an IK-Target which the whole bone chain will point to. For example a characters arm can be made to grab or point at something by only moving the IK-Target and the bone chain will follow.
- Blender Manual Link:
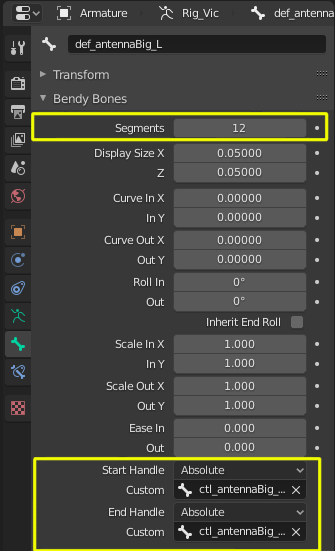
Bendy Bones
Blender gives us the option to change simple normal bones into bendy bones. Bendy Bones are bones with additional subsegments that can create arcs and bend similar to a simple curve object when we change it’s start and end point location.
We can enable Bendy bones by opening the Bone Object Property Rollout in the Properties Panel and changing the Segments Parameter. Additionally if we want to be able to control the bendy bones curve easily we can assign other bones as custom Start and End Handle at the bottom of the rollout.
Hint
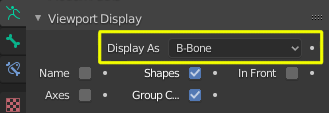
to be able to see the subsegments of the Bendy bones we have to change the Display Mode of our Armature to B-Bone
Rig Examples
FootRoll Leg Rig
Great for Humanoid characters that need a convenient to animate footroll mechanic.
- Download:
FootRoll-Rig Example
Bendy Bones IK Arm Rig
Noodly Arm that can bend once driven by an IK Chain with Stretch and Bendy Bones
- Download:
Bendy Bones IK Arm Rig Example
Spline IK Arm Rig
Noodly Arm that can bend in multiple different direction driven by a spline Curve.
- Download:
Spline IK Arm Rig Example
Tank Treads Rig
Tank Treads Rig building on the Tank Tread tutorial from an earlier lesson
- Download:
Tank Treads Rig Example