Lesson 5 - Recap
In this section we will look back at all the tools we have discussed so far. It will feature cheatsheets with the most used commands for each area.
We will also look at the Curve Object type and at the end of the section you can find two little “tutorials” on how to make tank treads and how to shrinkwrap geometry onto other objects.
Table of Contents
Camera
| Hotkey | Function |
|---|---|
| / | Isolate the currently selected Object/s (pressing again returns to normal mode |
| Numpad 0 | Look through the Scene Camera (pressing it again returns to viewport) |
| Ctrl + Numpad 0 | Sets the current object as Scene Camera |
| Ctrl + Alt + Numpad 0 | Aligns the selected camera to the viewport |
Modeling
Selection
| Hotkey | Action |
|---|---|
| LMouse | Select vertex, edge, face |
| Shift + LMouse | Add or remove vertex, edge, face from selection |
| Ctrl + LMouse | Point to Point selection |
| Alt + LMouse | Edge/Face Loop Selection |
| Ctrl + Alt + LMouse | Edge/Face Ring Selection |
| A | Select All |
| Alt + A | Deselect All |
| Ctrl + I | Invert current selection |
| Ctrl + Numpad+ | Grow current selection outwards (Select More) |
| Ctrl + Numpad- | Shrink current selection inwards (Select Less) |
| L | Select connected Geometry |
| Alt + Z | X-Ray-Mode (lets you select occluded geometry) |
Modeling Tools
| Hotkey | Action |
|---|---|
| Ctrl + R | Loop Cut and Slide Tool |
| K | Knife/Cut Tool |
| E | Extrude Tool |
| Alt + E | Extrude Menu |
| I | Inset Tool |
| Ctrl + B | Bevel Tool |
| X | Delete Element Menu |
| Ctrl + X | Dissolve Element Tool |
| M | Merge/Weld Menu |
| F | Create Face Tool |
| J | Connect Vertex Path Tool |
| Alt + S | Shrink/Fatten Tool |
| Alt + N | Normals Menu (Flip, Recalculate Inside/Outside, etc) |
| P | Spearate Geometry Menu (Separate selected faces into new object) |
Object Tools
| Hotkey | Action |
|---|---|
| Ctrl + J | Join Objects Tool (Join selected objects to active object) |
| Ctrl + A | Apply Menu (Apply Scale, Rotation, Location, etc) |
| Ctrl + L | Make Links Menu (Apply modifiers, material, etc from active to selection) |
| Shift + L | Select Linked Menu (Select Instances, Objects with same Material, etc) |
BoolTool Hotkeys
| Hotkey | Action |
|---|---|
| Ctrl + Shift + B | BoolTool Context Menu |
| Shift + Ctrl + Numpad- | Destructive/Auto Boolean Difference |
| Shift + Ctrl + Numpad+ | Destructive/Auto Boolean Union |
| Shift + Ctrl + Numpad* | Destructive/Auto Boolean Intersect |
| Shift + Ctrl + Numpad/ | Destructive/Auto Boolean Slice |
| Ctrl + Numpad- | Procedural/Brush Boolean Difference |
| Ctrl + Numpad+ | Procedural/Brush Boolean Union |
| Ctrl + Numpad* | Procedural/Brush Boolean Intersect |
| Ctrl + Numpad/ | Procedural/Brush Boolean Slice |
Curves
Hotkey: Shift + A >> Curve
Curves are a different type of base object in blender. They are an implementation of a Bezier Curve in 3D-Space.
A Bezier curve consists of the following subobjects:
- The Vector path itself
- Control Points the path has pass through
- Handles that control how the path passes through the control points (Handles are always tangential to the curve path)
Tools you can use on the Curve object in Edit Mode:
| Hotkey | Selection | Action |
|---|---|---|
| G | Control Point/Handle | Move Control Point/Handle |
| R | Control Point | Rotate Control Point and its Handles |
| S | Control Point | Scale the Control Points Handles |
| Alt + C | Doesn’t matter | Close/Open the Curve by connecting/separating its first and last point (Toggle Cyclic) |
| E | Control Point | Add/Extrude another Point |
| RMouse >> Subdivide | 2 adjacent Control Points | Adds a Control Point in between the two seleted ones |
| V | Control Point/Handle | Lets you toggle the Control Point/Handle type |
Workflow tips
How to make tank treads
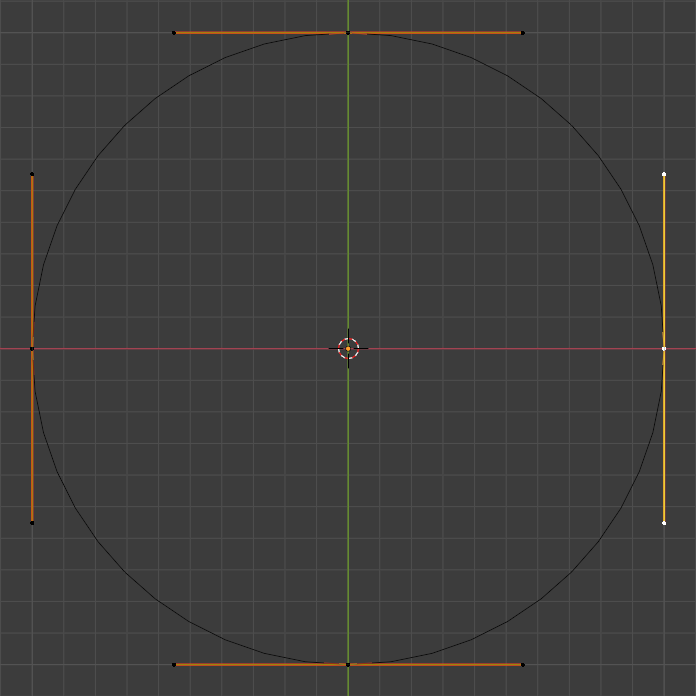
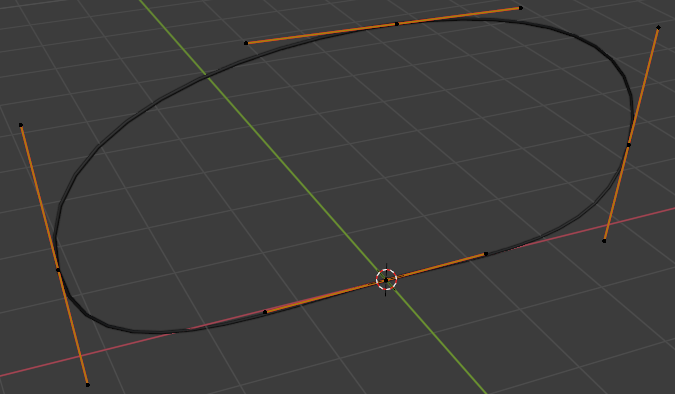
To make tank treads for our robot concept we need a guide path that our treads can follow along. For this we will use a Curve Object.
Use the Circle Curve Primitive as a starting point for you tank treads and adjust its shape with the tools mentioned above until you are happy with it.
Array Modifier
The Array modifier will copy our mesh at fixed distance along a chosen axis. We will use it to create copies of our single piece of tanktread.
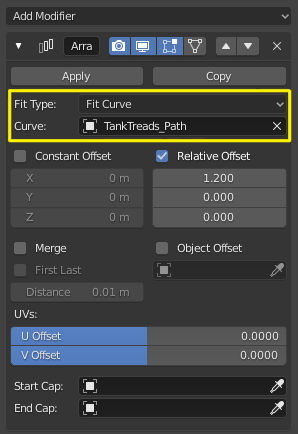
Add an Array modifier to your single tank tread object
Set its fit Type to Fit Curve and pick your Tank Tread Guide Curve in the Curve Slot
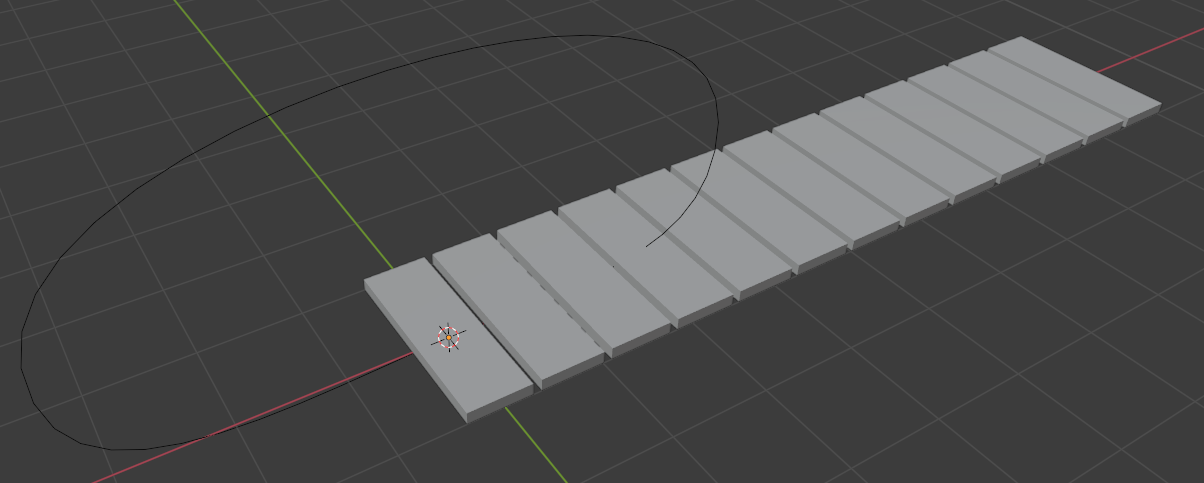
The Array modifier will automatically create enough copies of your single tank tread to fit the entire length of the Tank Tread Guide Curve.
Use the X, Y, Z Values in the Relative Offset/Constant Offset Section to change the width of the gaps between your tank treads.
- Blender Manual Link:
Curve Modifier
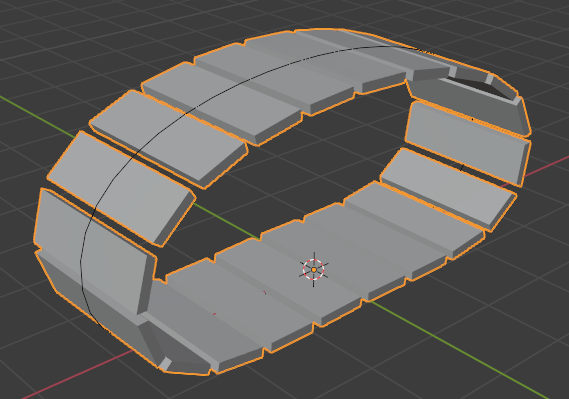
We will use the curve modifier to deform our arrayed geometry. The modifier will take care of wrapping our treads around the supplied curve.
To do this:
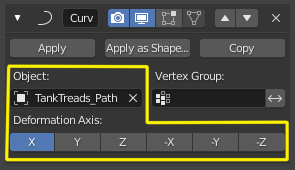
- apply the curve modifier to your arrayed tank tread and and pick your TankTreads_Path Curve in the Object Slot.
- Choose the right Axis with the buttons in the Deformation Axis Area
- Blender Manual Link:
Shrinkwrap modifier | How to wrap geometry onto other geometry
The Shrinkwrap modifier is a rather simple but nonetheless very powerful modifier. It can project and deform geometry onto other geometry and make it follow the targets surface.
How to use:
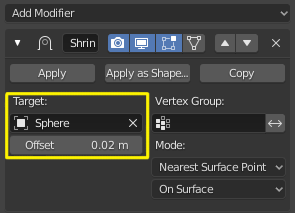
- Add the Shrinkwrap modifier to the object you want to conform to another geometry
- Add the GuideMesh/Object you want your geometry shrinkwrapped to in the Target Slot
- Adjust the Offset parameter to push the object off the GuideMesh’s surface
- Blender Manual Link: