Lesson 1 - Primitives
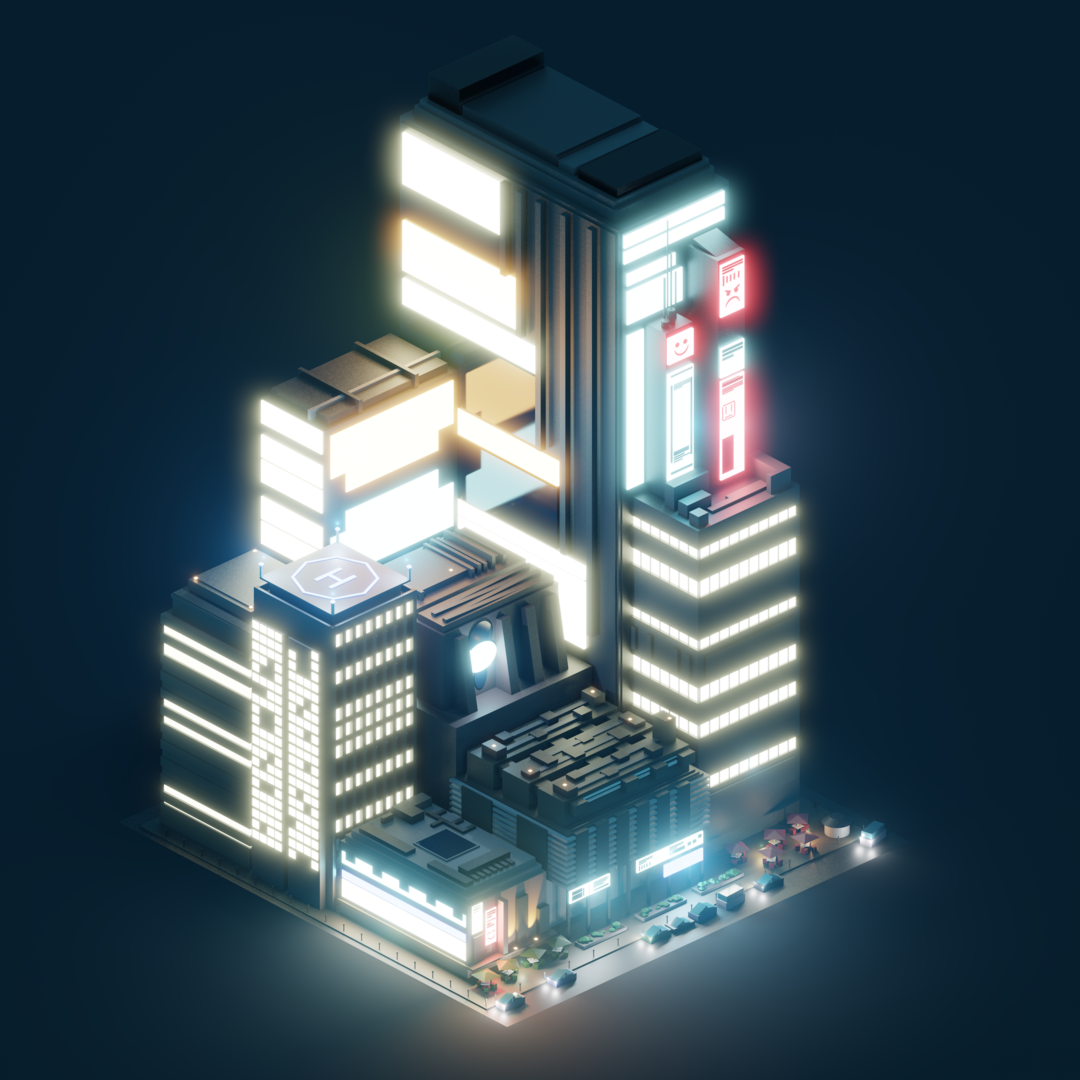
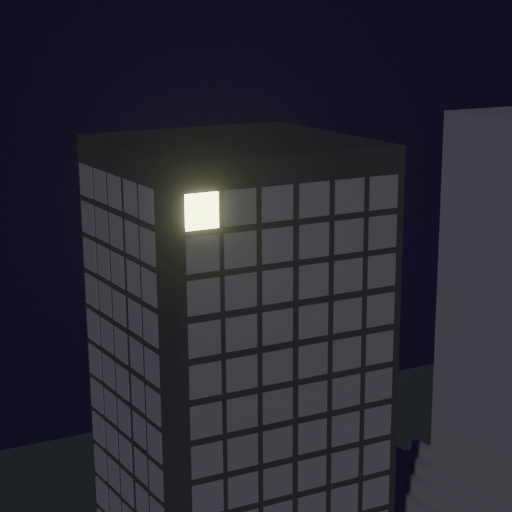
The goal of this lesson is to create a cyberpunk/scifi city block by arranging simple primitives. Basic Material creation and assignment to the primitives and simple lighting are also part of this exercise. The result should come somewhat close to the example below.
- Exercise Naming Convention
- Name every file you turn in for the assignment with the following naming convention:lesson1_firstname_lastname.ext (where .ext is the file extension e.g. .jpg, .png, .blend)
- Exercise submission:
- Render 1080x1080 PNG-File (Eevee)
Tools needed for the exercise
Selection
| Hotkey | Function |
|---|---|
| LMouse | Select an object |
| Shift + LMouse | Add or remove object from selection |
| Ctrl + LMouse-BoxSelect | Remove box selected objects from selection |
- Blender Manual Link:
- Blender Manual | Selecting
Active Object
The active object is the object which properties are displayed in the Properties Panel. It is often the last selected object, which makes selection order important because many operators pay special attention to the active object versus the other selected objects.
Duplication
To duplicate the selected object simply press Shift + D. Blender will duplicate all selected objects and put you into the gizmoless Move/Grab Object(s) mode where you can either place the object(s) where you want or cancel the transformation by clicking RightMouse-Button. The duplicate object will then be in the same position as the original and overlap it.
Tip
If you want to rapidly duplicate objects you can repeat your last duplication and move by pressing Hotkey: Shift + R (This hotkey will repeat the last action you performed)
Duplication (Shift + D) and move followed by Repeat Last (Shift + R)
For more information please refer to the official blender manual:
- Blender Manual Link:
- Blender Manual | Duplicate
Snapping
Snapping helps you place an object more accurately by automatically aligning object features to each other. The Blender manual is very thorough on this topic and explains it very well.
| Hotkey | Function |
|---|---|
| Ctrl (while transforming) | Holding down Ctrl enables snapping until you release it again |
| Shift + Tab | Enables or Disables Snapping globally |
| Ctrl + Shift + Tab | Opens the Snap settings as a floating panel next to your mouse |
- Blender Manual Link:
- Blender Manual | Snapping
The 3D Cursor
The 3D Cursor is unique to blender and can speed up your workflow quite a bit. You can position it by holding Shift + RMouse and draging in the 3D View. You can even use snapping to snap it to object features.
Positioning the cursor has quite a few benefits. When you add objects to your scene you can choose to spawn them at the cursor position instead of at the world center. You can also use the cursor as a transform, rotation or scaling center instead of the objects center of mass (Pivot Point).
Tip
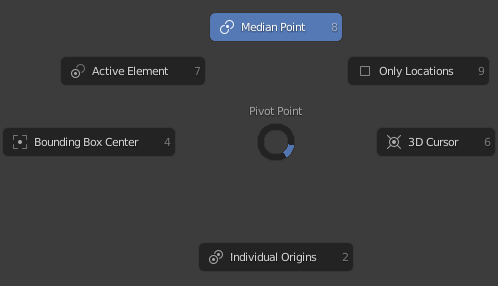
Quickly changing the pivot point is done by pressing Hotkey: . (Dot) on your keyboard which will open the Pivot Point Pie Menu (shown below).
- Blender Manual Links:
- Blender Manual | 3D Cursor Blender Manual | Pivot Point
Materials
Note
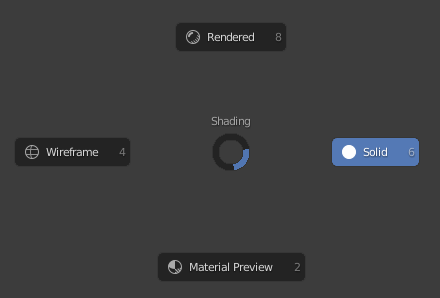
To be able to see materials in our 3D Viewport we need to make sure we are in the proper Viewport Shading Mode. Materials are only getting displayed in Material Preview Mode and Rendered Preview Mode. The buttons to switch between the different shading modes are in the top right corner of the 3D Viewport

In order left to right:
- Wireframe (Only Mesh edges visible)
- Solid (Object surfaces visible shaded in grey)
- Material Preview (Shows Materials in a default light setup and is active in the screenshot above)
- Rendered Preview (Shows Materials affected by our Scene Lights)
Assigning New Materials to objects
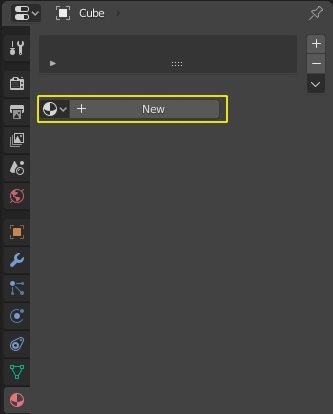
To assign a material to an object click on it in the 3D View and then open the
 Material Properties panel. You can add a new material to
the object by clicking on the New Button highlighted in the image below.
Material Properties panel. You can add a new material to
the object by clicking on the New Button highlighted in the image below.
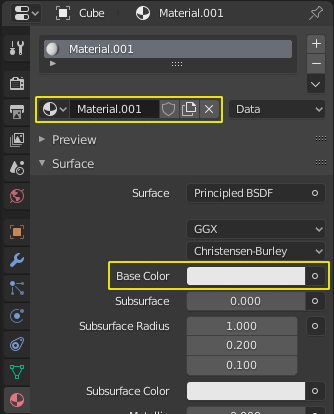
A Principled BSDF Shader Material will be assigned to your object. You can change its name in the text input highlighted in the image below.
Note
For now we will ignore almost all of the settings on the material and just use BaseColor (also highlighted below) to change our object color.
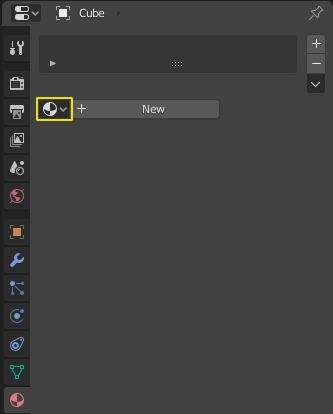
Assigning existing Materials
I recommend naming all your materials and reuse them as much as possible, both because it doesn’t clutter up your scene and also makes edits to the materials faster, if you have the same material assigned to multiple objects.
To assign an existing material to an object click the Material dropdown Button (shown below) and choose one of the materials from the list that pops up.
Tip
If you have a lot of objects that you want to assign the same material to you can do that in a single step aswell.
- Select all Objects you want to apply the material to (Shift + LMouse)
- Select an object that has the material applied you want to apply to all other objects
- Press Hotkey: Ctrl + L and select Material
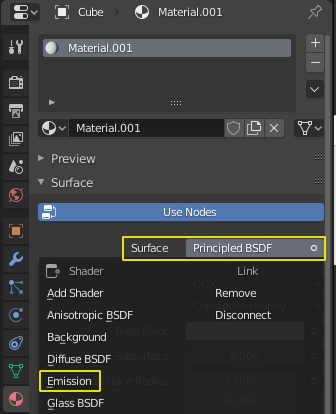
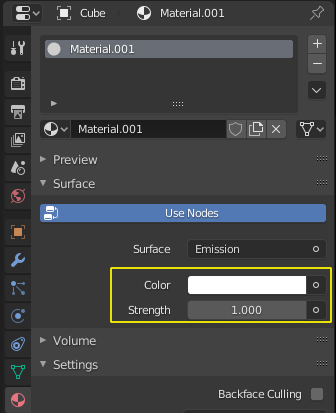
Emissive/Glowing Materials
To change a default Principled BSDF Material to a glowing/emissive Emission Material simply click on the Surface Slot of the material and change its surface type to Emission like in the image below. Adjust the Materials color and glow strength to your liking.
Lighting
Light sources
You can use any of the Light objects listed in the Add Menu (Shift + A) >> Light Category to light your cityscape. For more information on the different light types consult the official blender manual linked below.
Light sources available:
- Point Light (Use for spherical light sources)
- Sun / Directional Light (Great for distant light sources like sun or moon)
- Spot Light (Cone shaped directed light, great for car headlights and other directional lights)
- Area Light (Softbox light, very smooth and diffuse shadows the larger the light source)
The Settings for a Light Object can be found in the  Object Data Properties
which are located in the Properties Panel on the right hand side of the Blender UI.
Object Data Properties
which are located in the Properties Panel on the right hand side of the Blender UI.
- Blender Manual Link:
- Blender Manual | Light Objects
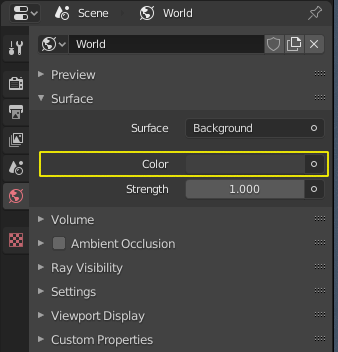
The World Environment
The World Environment also factors into how our scene gets lit. You can adjust
your Worlds settings by navigating to the  World Properties
located in the Properties Panel on the right hand side of Blenders UI.
I recommend settings this to a dark blue color to simulate a night scene for the
assignment for this lesson.
World Properties
located in the Properties Panel on the right hand side of Blenders UI.
I recommend settings this to a dark blue color to simulate a night scene for the
assignment for this lesson.
- Blender Manual Link:
- Blender Manual | World
Rendering
Interactive Preview
To get an idea of what your end result will look like while you are working on it and adjusting your settings. You can switch the 3D Viewport to Rendered Preview by clicking the rightmost button in the 3D Viewport Shading menu in the top right of the 3D Viewport (Shown below).

You can also change to Rendered Preview by pressing Hotkey: Z on your keyboard to open the Shading Pie Menu and choose the Rendered option.
Camera
To be able to make a final render we will need a camera in our scene that is set as default scene camera.
Add one by pressing Shift + A >> Camera if this is the first camera you are adding to the scene it will automatically be set as default scene camera.
Useful hotkeys for Camera usage:
| Hotkey | Function |
|---|---|
| Numpad 0 | Look through the Scene Camera (pressing it again returns to viewport) |
| Ctrl + Numpad 0 | Sets the current object as Scene Camera |
| Ctrl + Alt + Numpad 0 | Aligns the selected camera to the viewport |
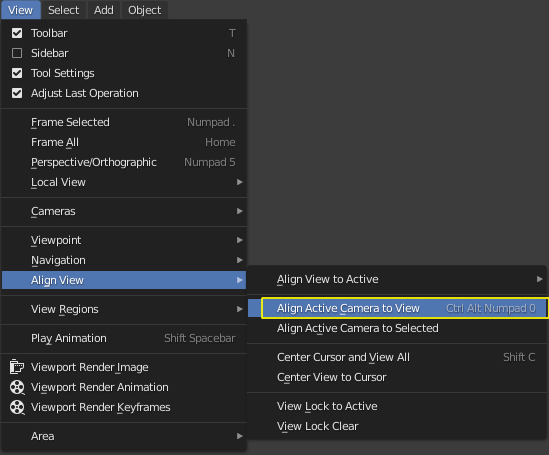
Location of the Align Active Camera to View command (Hotkey: Ctrl+Alt+Numpad0) in the 3D Viewports View Menu
Note
 Scene Properties in the Properties Panel and set it to the camera you want.
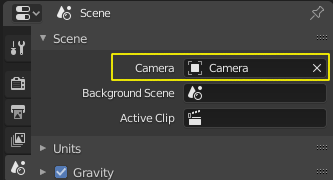
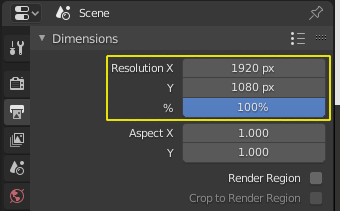
Output settings
To set the output render size you will have to visit the  Output Properties Panel in the Properties Panel.
Set it to 1080x1080 pixels for this assignment
Render Settings
We are rendering with the EEVEE Realtime Render engine so make sure it is set by
opening the  Render Properties in the Properties Panel
and setting the Render Engine: to EEVEE
Render Properties in the Properties Panel
and setting the Render Engine: to EEVEE
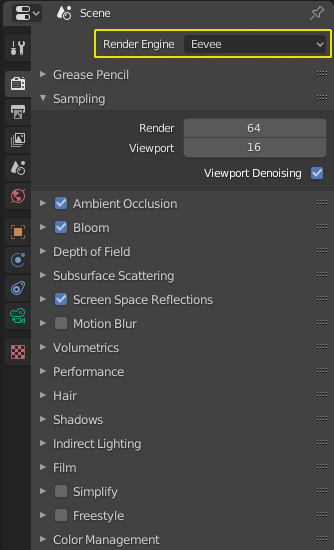
EEVEE’s Render settings are then listed below in the same panel, where you can tweak its settings to your liking. I recommend enabling:
- Bloom
- Ambient Occlusion
- ScreenSpace Reflections
- Increasing Shadow Map resolution (If your pc can handle it)
- Blender Manual Link:
- Blender Manual | Eevee
Rendering the Image
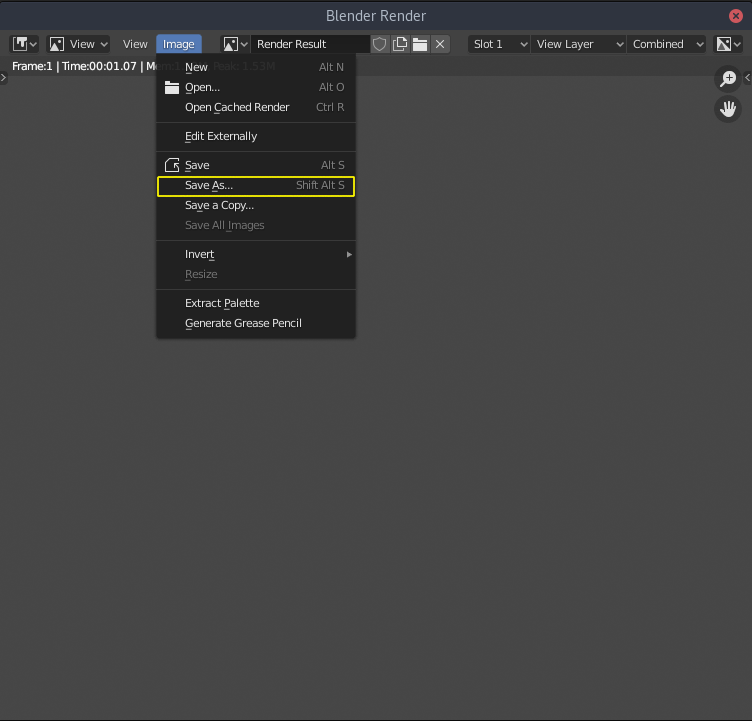
Finally we can start rendering our image by pressing F12 or by selecting Render >> Render Image in the Topbar Menus. A new floating window the Blender Render window will appear and your pc will calculate the final image.
Once the render is completed you can save the Final Image by clicking on Image >> Save As… or by pressing Hotkey: Shift + Alt + S. Blender will ask you for the location and name of the image, once you navigated to the proper folder and named your output you are done with this assignment.